Nowadays, people are more conscious of cleanliness and hygiene than ever, which is why they understand the importance of installing garbage disposals. A garbage disposal grinds the waste food and helps to keep the pipe of your kitchen running smoothly.
The garbage disposals are attached to the sink and they have a discharge that is connected to the drainpipe to clear the waste food away. They are generally available in 1/3 up to 1 horsepower in the market.
If you are thinking of replacing the old garbage disposal or installing a completely new one the following instructions will guide you to meet your need. The installation process varies based on the condition of your kitchen sink and dishwasher, and the rules for each condition have been explained in detail. Let’s start the discussion of how to install a garbage disposal.
Table of Contents
Replacing an Old Garbage Disposal and Installing a New
Replacing old garbage disposal and installing a completely new one is far easier than installing a new garbage disposal for the first time.
If you are replacing old garbage disposal and installing a new one of the same model the task becomes easiest because in such case you just have to remove the older garbage disposal unit and require minimum steps to be followed to install the new one.
If the new garbage disposal unit is not as same as the previous one, the task is not difficult too. You need to make some measurements to check whether the dimensions fit in the available space or not.
Installing a New Garbage Disposal First Time
If you are going to install a new garbage disposal for the first time you should check whether the plumbing and wiring systems are compatible with your chosen garbage disposal unit or not. At present, most of the building codes require a 120-volt and 20-amp outlet underneath the sink and adjacent to the garbage disposal unit.
If the required circuit does not exist in your kitchen, you need to get it done to install the garbage disposal unit. One more important thing I would like to mention that a switch is needed to control the outlet and it should be accessed easily to the users.
You can hire a professional to check the compatibility of these plumbing factors and install the circuit as well as the switch.
Before starting the main work of the installation process you need to gather the following apparatus since you will require these for installing the garbage disposal unit.
8 Important Tools to Install a New Garbage Disposal Unit
Manage all garbage disposal accessories in your hand along with the installation tool kits.
- Screwdrivers
- Electrical Cord
- Plumber’s putty
- Hammer
- Plug-in power cord
- Channel-type pliers
- Garbage disposal mounting ring and drain fitting
- Safety kits such as goggles or a dust mask
5 Simple Steps to Install a Garbage Disposal Unit
Step 1: Turn off the Electric Switch
At first, you must switch off the circuit breaker of your kitchen. You must not forget this, otherwise, there is a great possibility of occurring an accident due to electrical shock.
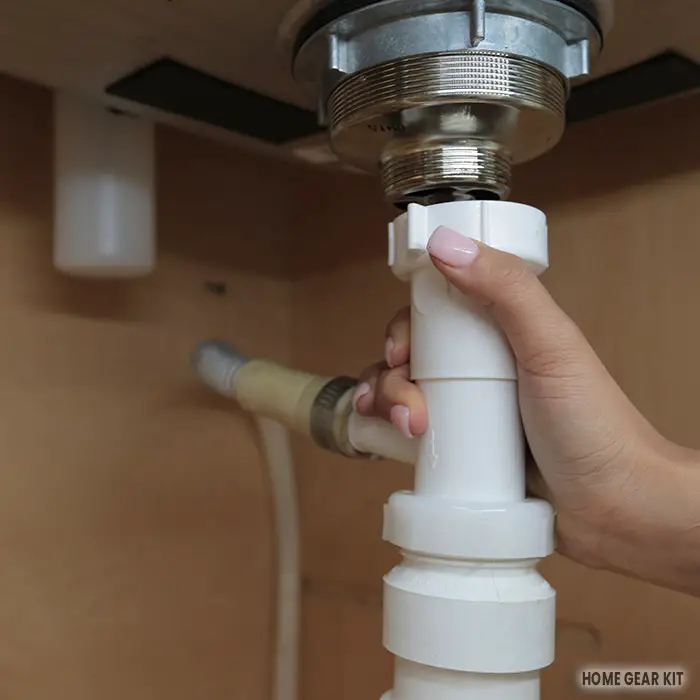
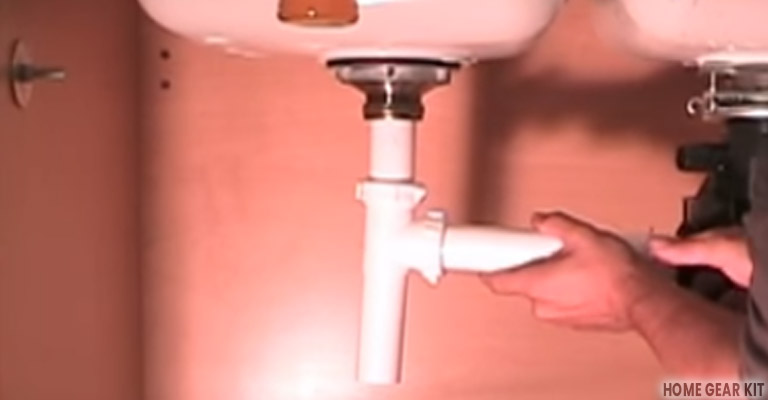
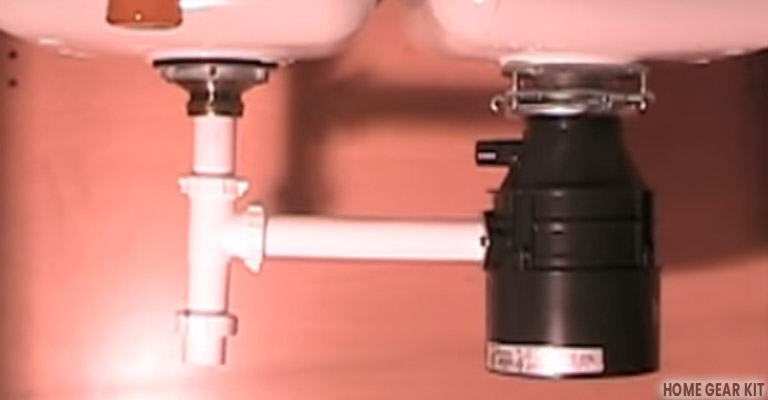
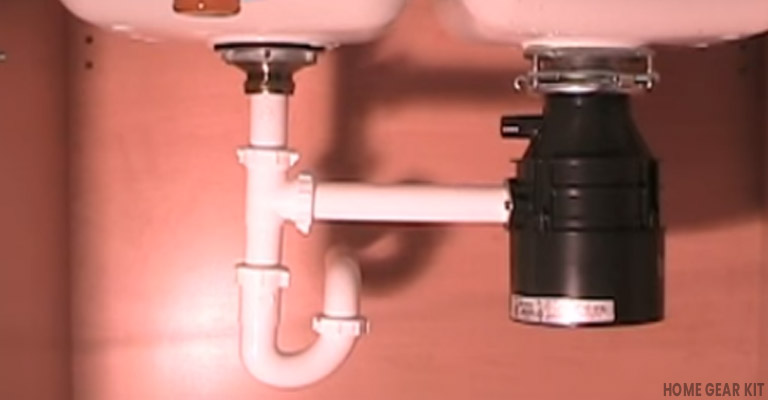
After switching off the garbage disposal unit bring a bucket and set it beneath the P-trap. Then disconnect the drainpipes and remove the filter of the sink. If there is an excessive amount of putty remove that too.
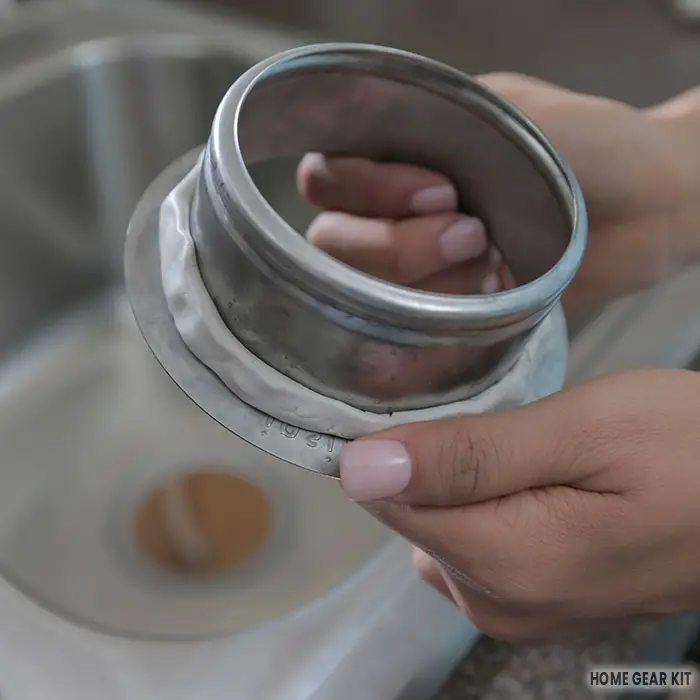
Step 2: Apply Plumber’s Putty around the Drain
The new drain that you have purchased for installation apply plumber’s putty around it and press it into the place.
Then bring a towel and lay it on your sink. After that, set the disposal on the flange so that it cannot do any movement.
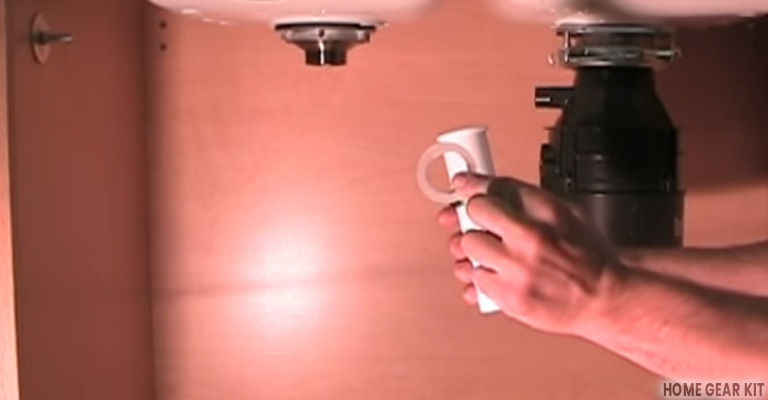
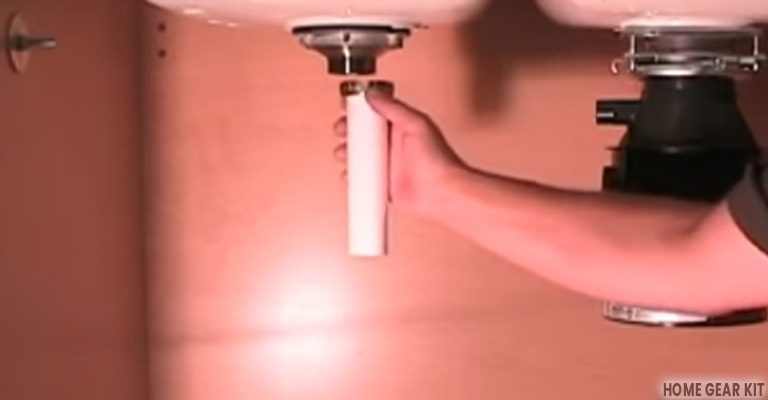
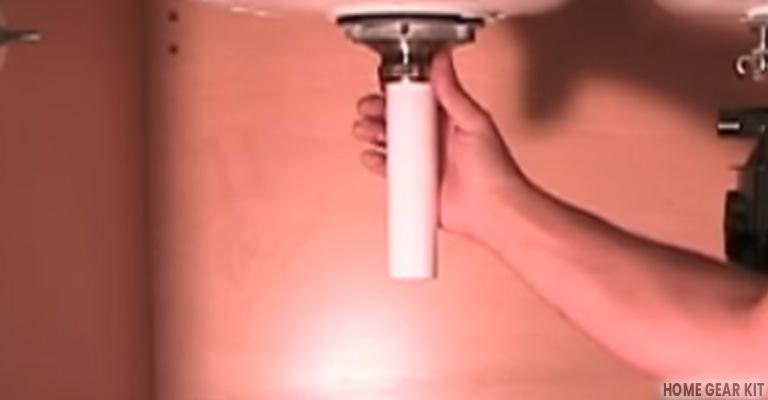
Step 3: Install the Snap Ring
Now it is time to stack the fiber gasket, backup flange, and mounting ring below the sink and slide onto the back portion of the flange.
Then you have to install the snap ring. Installing a snap ring is very easy. You have to pull it open and snap it onto the place and it will be set.
Using the screwdriver tighten the screws firmly against the backup flange. If you notice any excessive putty there, clean up those excessive putty.

Step 4: Connect the Disposal Unit
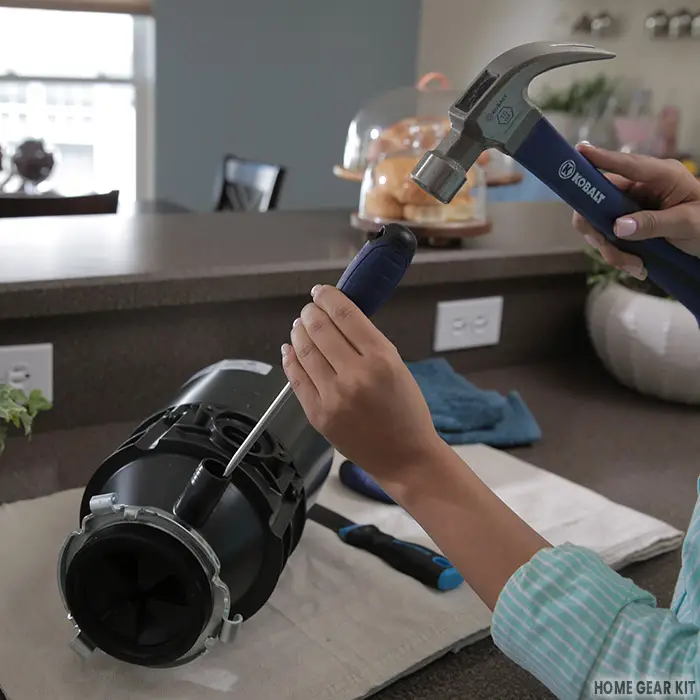
Now it is time to connect the disposal unit to the dishwasher drain. Pick up the hammer from your toolbox and remove the drain plug from the inlet on the disposal.
Step 5: Connect the Electrical Cord
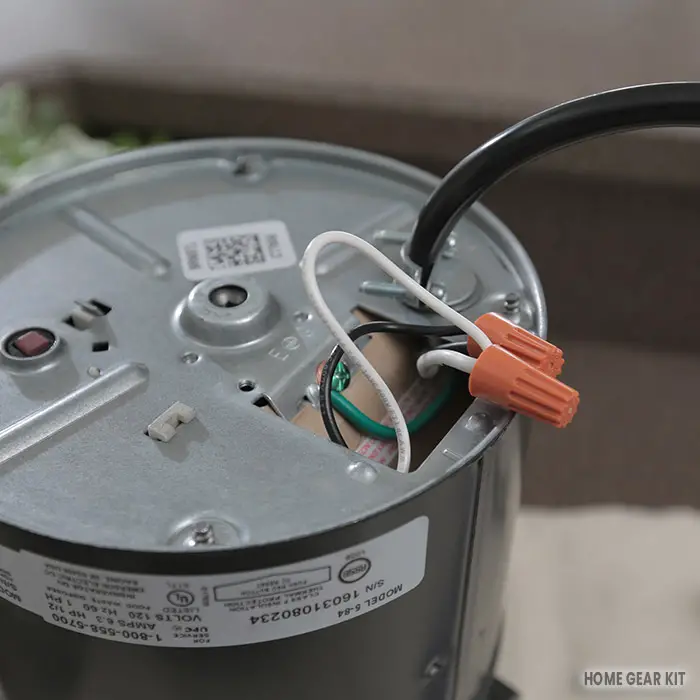
Finally, disconnect the wire cover plate and connect the electrical cord. During connecting the electrical cord be conscious of matching the colors. Then push the wires back in and attach the plate again. And, the installation process is complete.
How to Install a Garbage Disposal in a Double Sink?
Sometimes, people face difficulties to install the garbage disposal if the sink has a double bowl. But it is not a difficult task at all if you know the process.
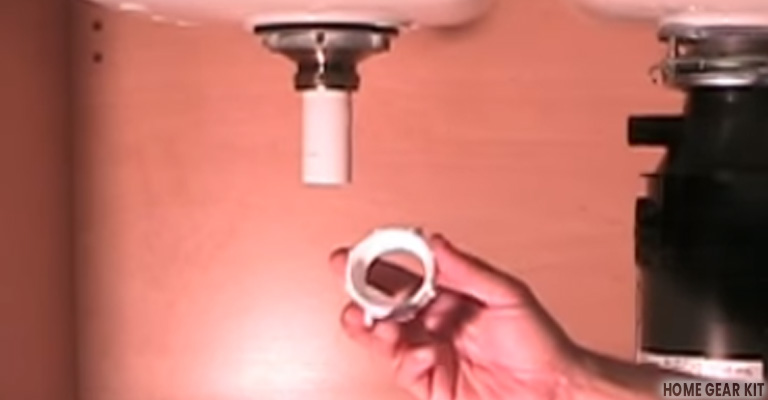
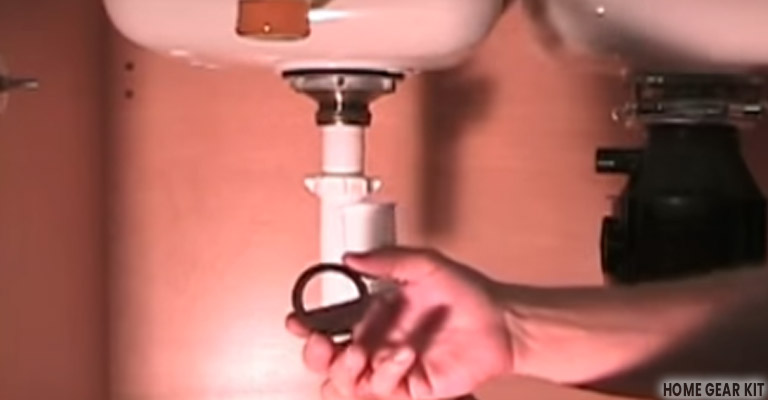
- At first, you have to remove the tailpiece nut from the strainer of the sink. Then you have to place the tailpiece washer on to the tailpiece and fit the nut of the pipe.
- Screw the tailpiece nut onto the strainer to attach the tailpiece.
- To attach it firmly tighten it with your hand properly.
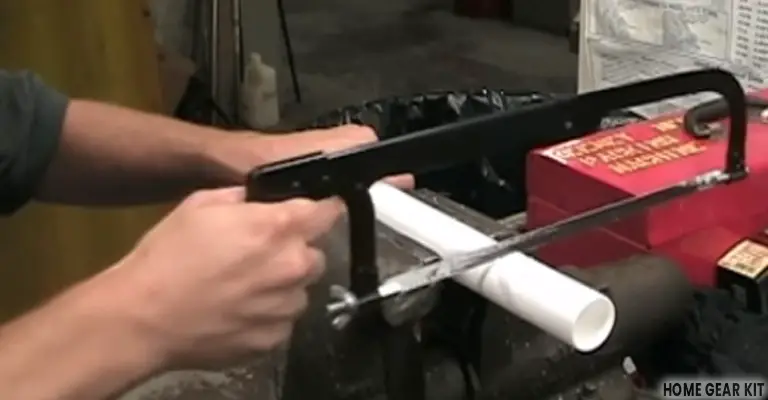
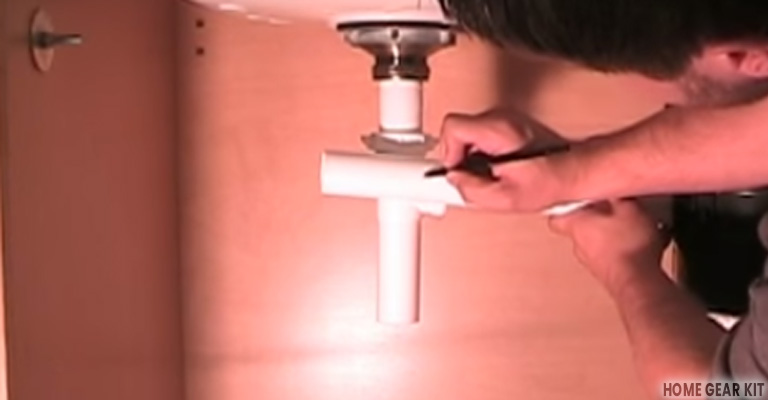
- Align the t-joint with the disposal outlet and mark upon the tailpiece.
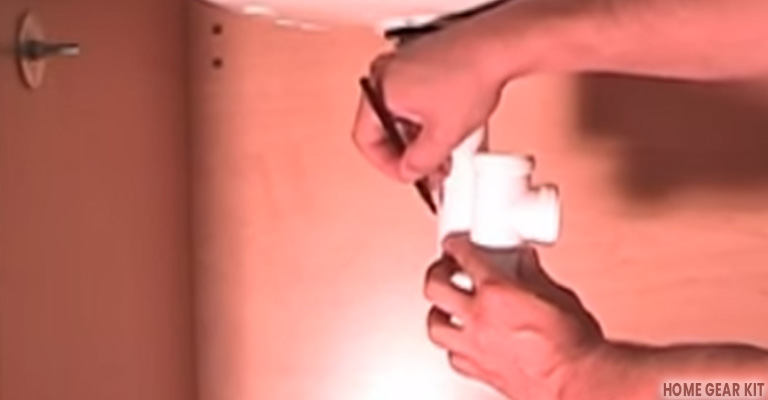
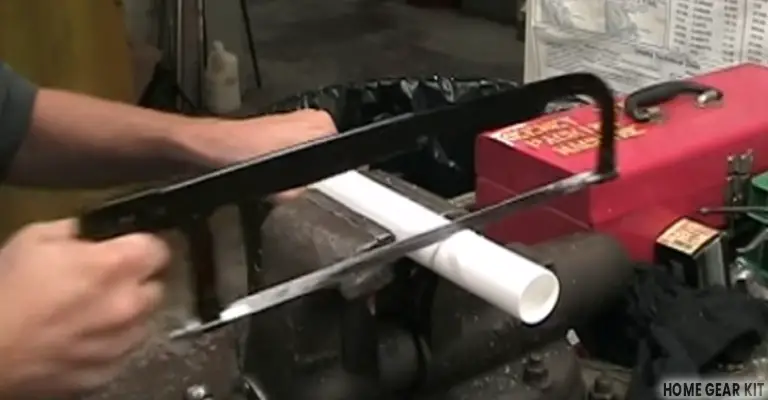
- Cut the tail-piece according to the measurement using a hacksaw and reinstall it following the instructions stated earlier.
- Then fit a sub joint nut followed by a sub joint washer onto the tailpiece.
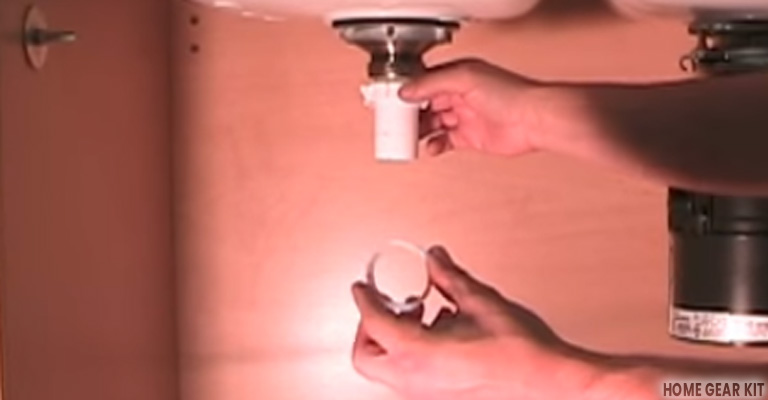
- Attach the t-joint to the tailpiece and tighten it firmly with your hand. While tightening keep the inlet of the t joint with the outlet of the disposal unit.
- Using the longer tail-piece place the flange and measure the distance with the disposal outlet by marking with a marker.
- Again using a hacksaw cut the tailpiece to the required size.
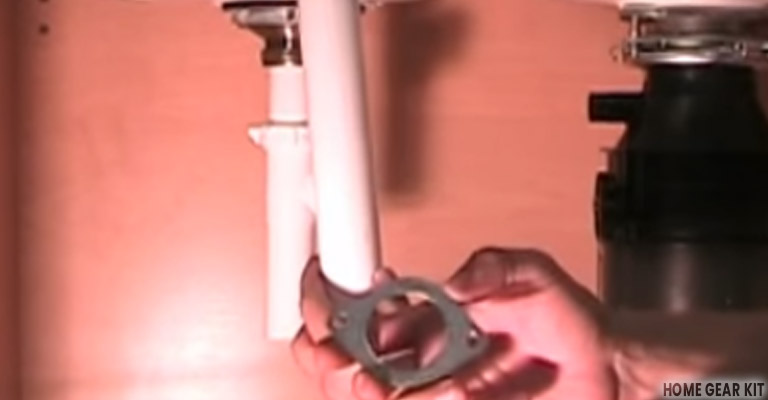
- Place the rubber disposal washer on the flange end of the tailpiece.
- Fit the disposal’s mounting flange onto the tailpiece followed by a sub joint nut and washer.
- Attach the tailpiece to the t-joint and tighten the sub joint nut and the washer using your hand. Align it correctly. The screw the mounting flange into place. Then check all connections to ensure that all the nuts are tightened properly.
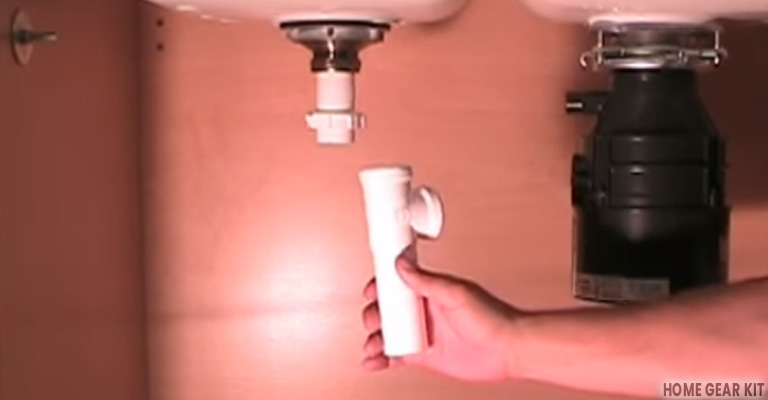
- Fit another sub joint nut followed by a sub joint washer of the outlet of the t-joint.
- Attach the t to the p-trap or another drain by hand tightening of the sub joint nut and the washer.
You can watch the following video clip to understand the whole process more clearly.
Installing a Garbage Disposal with Dishwasher
The common problems with dishwashers are that there is no drain line from kitchen plumbing connected to the dishwasher. Thanks to the garbage disposal unit because if you install it connecting the dishwasher becomes relatively easy.
You need some more tools for installing garbage disposal with a dishwasher except for the previously mentioned tools:
- Air-gap fitting
- Needle-nose pliers
- Utility knife
- 1-inch hose clamp
To install the garbage disposal with a dishwasher you need to follow the following steps:
- At first, you have to turn off the electrical circuit breaker or you can unplug the electrical outlet from the garbage disposal in the sink cabinet.
- The screws that secure the door hinges to the frame of the cabinet remove those for making the installation process easier. At the initial step take off the doors and after completing the total work connect the hoses and reinstall the door.
- Look at the side of the garbage disposal and you will notice the port of the larger drain pipe. Above this port, there is a hose nozzle. Take your screwdriver and insert it into the hose nozzle.
Then pick up your hammer and struck lightly the end portion of the screwdriver with it so that the knock out plug inside the nozzle can be removed.
- At the rear portion of the sink, you will notice a hole. Insert a threaded stem at the top of the air-gap fitting into that hole.
- Then insert the rubber washer on the upper portion of the stem and screw on the trim cap by hand. Holding the fitting from below tighten the cap firmly. Then rotate the air-gap fitting located below the sink by hand.
Caution: It is highly recommended not to use a wrench or pliers to tighten the cap because it may cause risk by scratching the finish.
- Then you have to push one end of the garbage disposal drain hose onto the nozzle and after that slide both of the provided hose clamps onto the other end of the hose. Then fitting the lower clamp onto the hose at the nozzle and tighten it firmly with the aid of the screwdriver.
- If necessary you can cut the upper portion of the hose to length using a utility knife so that it can fit easily into the air gap nozzle without bending.
- Slide the 1-inch hose clamp over the end portion of the dishwasher drain hose. If necessary cut it into required length so the end part can fit the vertical nozzle on the air gap fitting without bending or looping. Finally, fit the end portion onto the vertical nozzle and secure it firmly with the hose clamp. If you like to hide your garbage cans, read.
Wrap Up
Once you have used a garbage disposal unit you can never think of living without it because of the benefits provided by it. The installation process is so easy that you can do it by yourself with very little plumbing skill.
By installing a garbage disposal unit in your kitchen you are not only ensuring a healthy, neat and clean environment in your home but also you are contributing to maintaining a green natural environment because when the food wastes are ground properly they can help a lot to enhance the quality of the soil.
We recommend going through the manufacturer’s manual before installing the garbage disposal unit even if you have prior experience of this work because it is a common practice to bring some changes in the product.
If the manufacturers bring any change and that require any special care to install the unit you will get know about that fact from the manual. So, we recommend reading the instructions at least once before installing the garbage disposal unit even if you have experience of this work.