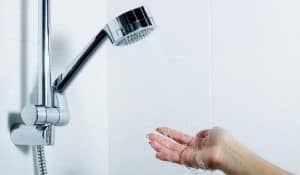
Shower time is meant to offer a relaxing experience, free from all stress and worries of the day to day life. The streaming bubbles of water can rejuvenate your mood. However if you have to face low water pressure, then it spoils the whole purpose of showering. You may even find it difficult to properly rinse the body. You will never get the best shower experience with water trickling through the shower. This may make you to look for methods to increase shower pressure. If you are someone facing the issue, then you are the right spot. In this article we will see methods how to increase water pressure in your shower.
Table of Contents
What Causes Low Water Pressure In Shower?
Before catching up with the methods to increase shower pressure, let us see what actually causes low shower pressure. By knowing the cause you will have better understanding of the solution to the problem.
- Plumbing related problems like leaks or blockages in the plumbing system can cause low water pressure in your shower. So you need to thoroughly check the plumbing system in your house and make sure that it is functioning properly and is also not causing you any trouble.
- Old main pipes supplying water to the houses can also cause low water pressure. The situation is adverse in cities, where local authorities may find it harder to upgrade the old main pipes without causing serious disruption. However if you live in rural areas, the water is pumped from wells to your households. In such cases, a faulty or broken pump can cause lower water pressure.
- High demands being placed on the water supply, either within the household or within the neighborhood, may also cause low water pressure in shower.
- Sediment deposit like limescale and mineral buildup in the shower head can cause blockages in shower heads, which can result in low water pressure in the showers. In such cases, the water pressure will be normal within the result of the household and yet water trickles through the shower head. This will let you know that the shower head needs to be cleaned.
- Another reason for low water pressure in your shower can be the flow restrictor being installed in them. Flow restrictors are installed in shower heads so as to reduce wastage of water. At times, this can also cause trouble as you find the water pressure no sufficient to clean up the body properly. Though not a recommended activity, you can get the flow restrictor removed to tackle the problem.
There can also be other causes like kinks in the flexible line of showers, the shut off valve being not properly open, etc. which can cause lower water pressure in your showers. When you encounter lower water pressure in your showers, you can look out for these causes so as to bring about a quick, effective solution to tackle the problem.
Methods To Increase The Shower Pressure
There are several methods you can try to improve the water pressure in your shower. Most of the methods are inexpensive. You can try these before trying out something expensive.
Checking For Plumbing Related Problems
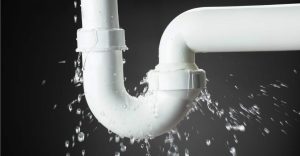
When dealing with low water pressure, one of the first things you can do is to look for plumbing related problems. You can inspect the plumbing system of your house and check for blockages or leaks in the system. Leaks and blockages can significantly reduce the water pressure in the shower as well as other water fixtures in your home. Also, leaks if left unmanaged can create huge mess later on. You need to check for any plumbing related mishaps and call your plumber for help. For minor temporary repairs, you can also use epoxy putty.
Shut Checking The Main Off Valve
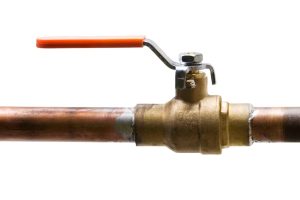
Suppose you have shifted to a new home or your building has undergone some work and you encounter low water pressure in your shower, then you need to check whether the main shut off valve is fully open. As there is chance that the plumbers may have shut off this valve before starting their repair works and would have forgotten to open it fully, which may have resulted in low water pressure in your water fixtures.
The main shut off valve will be located in the basement of your building. If not, you can look at the location where the water mains system enters your home. You can check if this shut off valve is fully open. If not, open it fully and you will see an improvement in the water pressure.
Inspecting The Water Line/ Hose Of The Shower
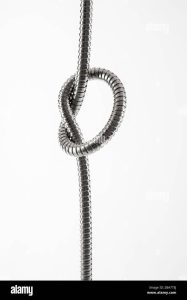
This is another immediate step you can have at the onset of low water pressure in the shower. If your shower has flexible water lines than pipes, then you need to inspect the water line or the hose for any kinks. Kinks if present can lower the water pressure in your shower thereby hampering the showering experience. In case of hand held shower heads, you also need to make sure that the hose is not twisted which may also cause a reduction in the flow rate of water from it. You can also try replacing the hose if it seems damaged.
Cleaning The Shower Head
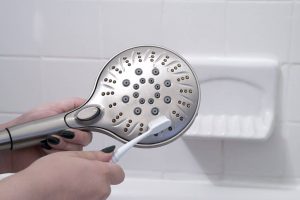
Blockages in shower head is one of the most common causes of low water pressure in your shower. Over time dirt and other debris can get deposited in the shower head. In hard water areas, there can also be deposits in the form of mineral deposit and limescale build up. All this lower the flow of water through the shower. You can easily identify if your shower head is at fault. This is because in such cases, the water flow will be normal in the rest of your home.
As a solution to the problem, you can clean up the shower head after unscrewing it from the shower arm.
Steps Involved In Cleaning Shower Head
- Shut off the water supply through the shower.
- Unscrew the shower head from the shower arm. You need to protect the connection using a towel. Then unscrew the shower head using pliers. You can further loosen the shower head by rotating in the counterclockwise direction.
- You need to look for the sediment deposits in the inside of the shower head. You can place the shower head under running water and get it cleaned by rubbing with your fingers. You can also make use of a small toothbrush to scrub off any stubborn sediment. If the shower head model comes with a filter, get that cleaned too. Ensure that the rubber nozzles have no blockages.
- For a more thorough cleaning, you can also place the shower head in a diluted vinegar solution overnight and scrub off the nest day.
- After properly cleaning the shower head, reattach the shower head. Remove the old plumber’s tape from the shower threads. Replace it with a new one. Cover the shower head with a towel; tighten it by rotating in the clockwise direction. Tighten it further with the help of plier and ensure it is properly fitted so that there are no leaks later on.
- You can now turn on the water supply and check if the sediment removal has improved the water pressure in your shower.
- If the problem is not solved, you can try reinstalling a new shower head.
Removing The Flow Restrictor
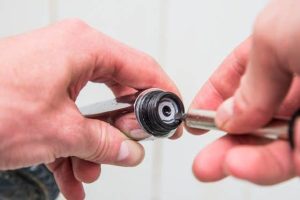
Before getting straight into the flow restrictor removal process, let us see what a flow restrictor is. Flow restrictors are in showers to reduce the rate of water flow from showers and thereby save water. They are made of plastic and feature a disk shape structure with tiny holes resembling much like a filter. Their presence converts the water stream into a much smaller water stream, reducing in water flow rate. They can also trap tiny debris. Overall, they serve the purpose of saving water, energy and also money..
Getting flow restrictors installed is necessaryas per the regulations in the United States. As per the regulations put forward by the National Energy Act, the water flow rate from showerheads should not exceed 2.5 gallons per minute and hence flow restrictors are designed to be an integral part of shower heads. This lets shower head manufacturers to include flow restrictors in showers by default. It is considered that shower heads operate most efficiently with the flow restrictor being installed. Not a recommended course of action, you can still get them removed at the expense of your utility bills. The removal procedure is quite simple and straightforward.
Though flow restrictors appear to be a beneficial inclusion, at times it can be a nightmare to have one installed in your shower head. In low water pressure areas, the flow restrictors can make the water to further trickle through the shower, making it impossible to properly rinse and clean the body. Also, when the flow restrictor gets clogged with mineral deposits, this can also reduce the flow of water through them. In such cases, you may either get the flow restrictor removed or get it cleaned and reinstalled.
Steps Involved In Removing Flow Restrictor From Shower Head
Before proceeding to the removal of flow restrictors grab the right tools and also take necessary precautions beforehand. You can follow the user manual for the best method specific to the model of your shower. However below mentioned is the most common method involved in the removal of the flow restrictor.
Tools Required
Watch out for the right tools and place them in easily accessible location so as to save time and effort. You may need:
- An adjustable wrench
- A cloth or towel
- Needle nose pliers
- A Teflon tape/ plumbers tape
Precautions
- Collect the right tools beforehand and also make sure that they are placed in easily accessible location.
- Turn off the water supply through the shower. You can also turn off the main supply which will ensure that you do not end up with a mess later on.
- Handle the different parts involved with care. Damaging any of these parts can make the reinstallation procedure difficult.
- Take help from someone if you want as this lets you have an easy access to the tools. There will be someone to check on your safety and also safe hands to hand over the parts that you end up removing.
As you have gathered the right tools and taken the necessary precautions, you can follow the below mentioned procedure to get the flow restrictor.
Locating the Flow Restrictor
Look through the user guide and locate the flow restrictor. In most cases, the flow restrictor will be located inside the shower head or in the hose connecting the shower head.
Removing Shower Head
To remove the flow restrictor housed inside the shower head, you need to remove the shower head first. Remove the shower head from the shower arm or the hose. Cover the connection with a cloth or towel which will ensure that you do not end up damaging the parts. Loosen the connection using pliers. You can further loosen and remove the shower head using your hands by rotating in the counter clockwise direction.
Removing The Flow Restrictor
Once the shower head is removed, proceed by locating and removing the flow restrictor. Look for the flow restrictor inside the shower head or the hose. Remove shower screen and O ring rubber gasket if present using needle nose pliers. This will reveal the flow restrictor. You can get the flow restrictor removed using needle nose pliers.
Reassembling the Shower Head
Once you have popped out the flow restrictor, you can proceed to reinstall the removed parts. You need to reinsert the O ring rubber gasket and the shower screen back to their original position. Before you reattach the shower head on to the shower arm, remove the old plumber’s tape from the shower arm threads and replace it with new plumber’s tape so as to ensure a leak free connection. Reattach the shower head back to the shower arm or the hose. You can use your hand to tighten the connection gently. Now after covering the connection with a towel, tighten it further using a plier.
Checking The Water Flow
After reassembling the parts, you can turn on the water supply and check the water flow. The water flow will have increased considerably.
Cleaning the flow restrictor to remove buildup
Suppose the flow restrictor seems clogged with mineral buildup, then you can clean it off the debris and replace it back for achieving improved water pressure. You can proceed as below:
- After removing the flow restrictor, get it cleaned by placing it under running water. You can try removing the dirt using your fingers. For thorough cleaning, you can also soak the flow restrictor in diluted vinegar and keep it overnight.
- Now you can proceed on to reassembling the parts. Place the flow restrictor back into its original position, followed by the rubber gasket and shower screen if present.
- Before reattaching the shower head on to the shower arm, remove the old plumber’s tape from the shower arm threads and replace it with a new one. This ensures a leak free connection. Now reattach the shower head back to the shower arm by gently tightening the connection with your hands in the clockwise direction. Now you need to cover the connection with a towel and tighten it further using a plier for ensuring that there are no leaks.
- Now you can turn on the water supply and check the flow of the water through the shower head. If you achieve improved flow rate, then your work was successful. If not, you can try replacing the flow restrictor with a new one.
Inspecting The Water Heater
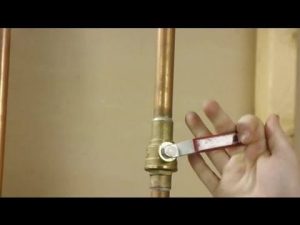
If the case is such that when using cold water, you have the required shower pressure, but you struggle with shower pressure when using hot water, then the cause of the problem may be related with the water heater. In such cases, you need to inspect the water heater and ensure that the shut off valve is open. If it is closed or not fully open, then you need to open the valve fully. Check the water pressure from the shower later on. This would have improved the hot water pressure from the shower.
If the shut off valve is already open and yet the hot water pressure from the shower is less, then this could be because of the sediment deposit in the water heater tank which causes blockage of the water flow, thereby reducing the hot water pressure through the pipe. When the sediment deposit increases, this could also cause the water pipes to get blocked. In such cases, you need to remove the sediment deposit in the pipes by draining your water heater and flushing out all the lines. Now you can check by turning on the shower and see if the hot water pressure has increased or not.
Consider taking shower during off peak hours
This is the no cost method of trying to improve the water pressure in the shower. We may not realise much, but there are certain times of the day when most of the neighbours would take shower. During morning hours, they may have to head for work or the children in the household would be heading off to school. In such a situation when everyone is looking to shower, obviously the demand on the water increases and this may not be sufficient to meet the needs of each and every one. This could also result in low water pressure in the shower. If possible you can try scheduling your shower routine in a manner that you use shower during the off peak hours, which may solve the problem of low water pressure in the shower.
Switch Off Other Appliances Which Demand Water Supply
Placing increased demand on water supply simultaneously within your household can also lead to low shower pressure. Suppose at the time you take shower, you are also running your dishwasher and washing machine, then there is an overall increase in the demand for water supply. The problem gets worse when you are in low water pressure areas, where the shower water starts to trickle. The solution to this problem is cutting down the demand on the water supply. You can take shower and later switch on your washing machine or dish washer. This ensures that there is no heavy demand on water supply within the household.
Grab A High-Pressure Shower Grab Head
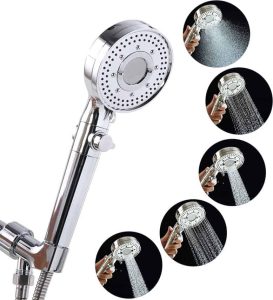
This method works especially if you are in areas of low water pressure. High Pressure Shower Heads are an inexpensive way to increase the water pressure in your showers. So if you are in an area assoiated with pressure issues, it is worth investing in a high pressure shower head. They can tackle the problem by offering a much more powerful stream of water in comparison to other regular shower heads.
9. Investing in Shower Pumps and Water Pressure Booster Pumps
Shower pumps can boost the water pressure in your shower. This method is expensive in comparison with high pressure shower heads. It is better to consult a plumber as he can guide you regarding the usability of shower pumps in your specific household, get the system installed and also let you know regarding other similar options to serve the purpose of tackling low shower pressure. Based on your budget, you can arrive at the best possible solution that will work exclusively for you.
We have seen some of the methods by which we can increase the shower pressure. The list contains some inexpensive, ready to do methods as well as few expensive options to try on. When encountering low shower pressure, proceed by checking the plumbing, shower head, water heater as quick fix methods. If these save the situation, then it will be way easier. Or else you can proceed on to buying some devices to tackle the situation. If nothing works, it is better to take the help from a professional plumber.