The water dispenser has become part of our modern society now a day. It is not only used for drinking water but can also be used for dispensing beverage, lemonade, iced tea, or any other drink which is usually taken cold.
This water dispenser can be made by the products that we use in our daily life. Some products casually lie around our house after their actual use comes to an end. These products can be used to make water dispenser at home very easily and without any cost.
Table of Contents
How to Make Water Dispenser at Home
You need to follow the instructions below to make water dispenser at home: –
Necessary Equipment
The things which will turn into an amazing water dispenser, are very common things we never thought about. These are:
- An empty Pringles can (big sized),
- An empty toothpaste tube,
- An empty Nutella jar,
- A hot glue gun,
- A glue stick,
- A vinyl wrap,
- A knife,
- A big scissor (left-handed scissor for lefties),
- A nail clip scissor,
- Straw,
- A pencil
Step-1: Cutting the Pringles Can
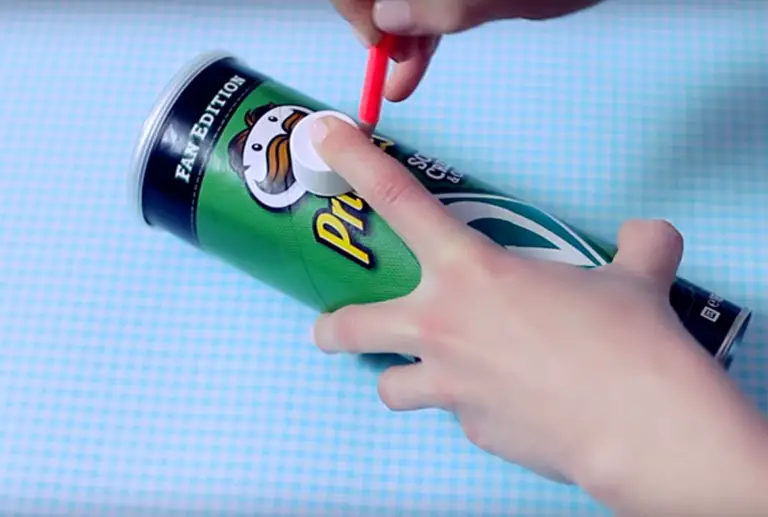
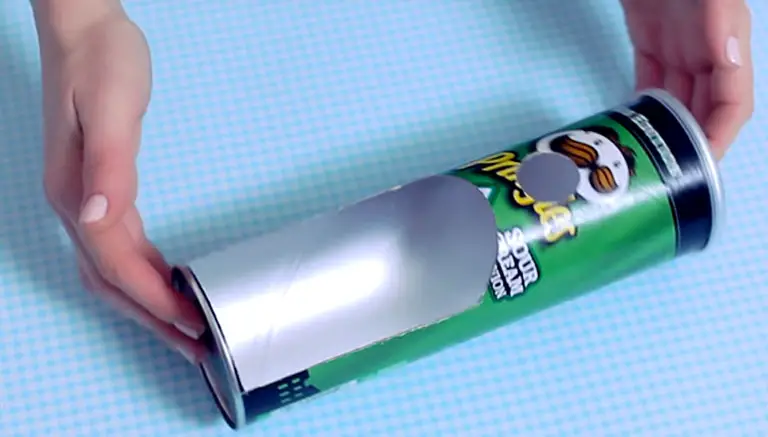
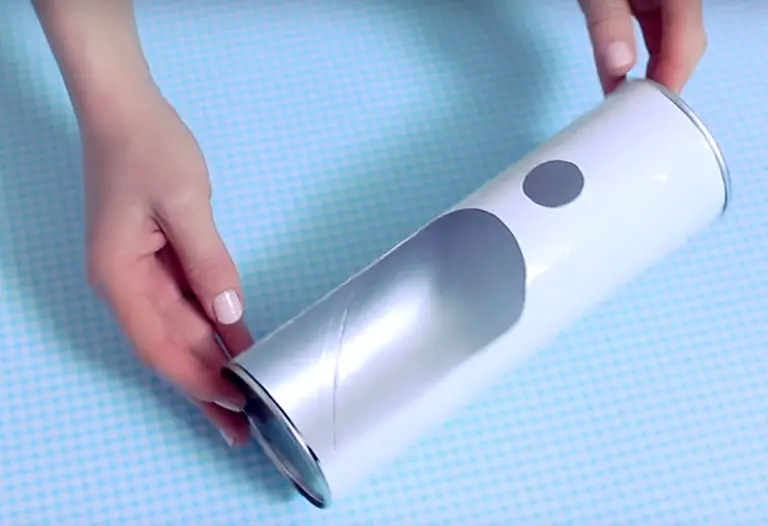
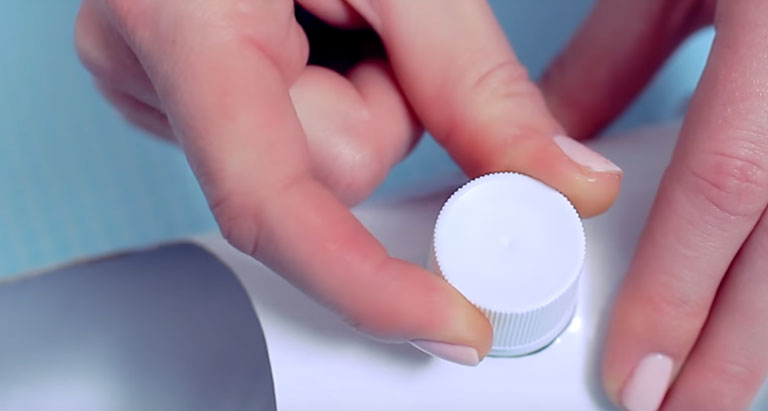
First of all, you need to make a circle as per the size of the toothpaste cap on the Pringles can and then cut the Pringles can according to the size that is drawn so that the cap can be set there.
Now, a curved line, like a half-moon, needs to be drawn just below the hole. Then two straight line needs to be drawn connecting the two ends of the curved line to the lowest part of the can.
Next, you need to cut the shape you just drew. This shape needs to be big enough to place the glass/ mug in which you will keep the dispensed water.
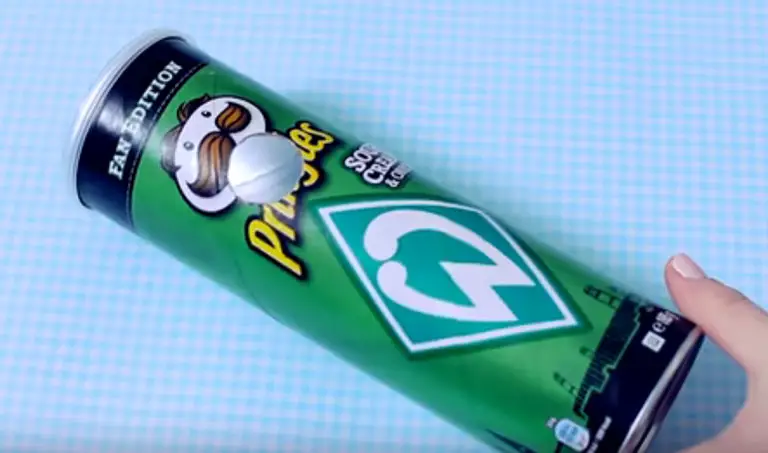
Picture: The hole
Step-2: Wrapping the Can
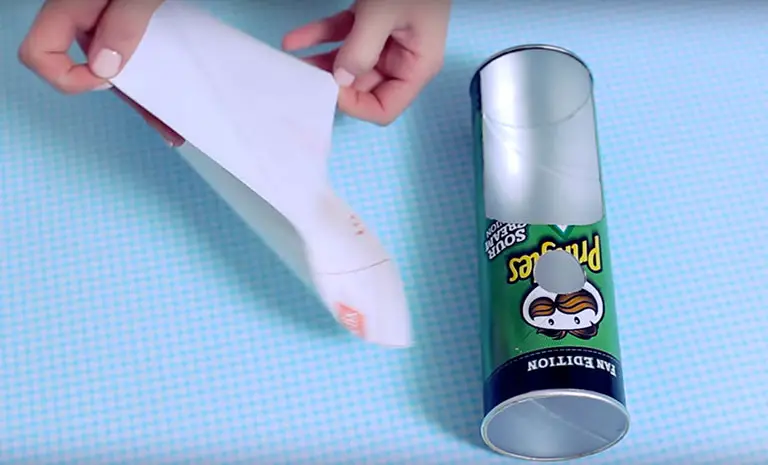
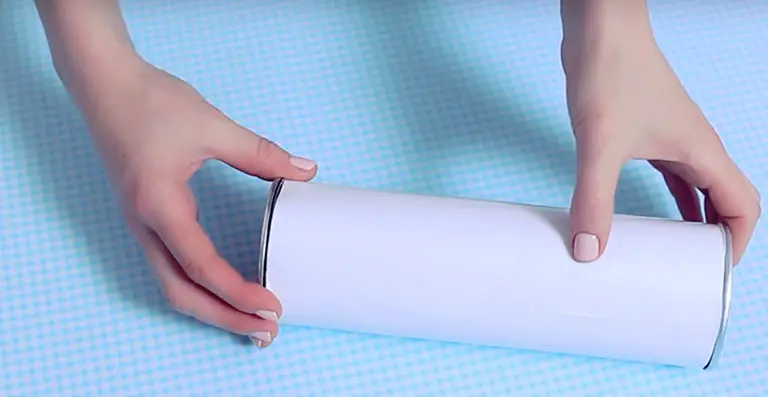
In this step, you will need to have a vinyl wrap. First, take out the vinyl wrap and wrap it around the can so that it looks good. Now you must cut the vinyl wrap according to the shape you just cut in step 1. Follow the pictures below:
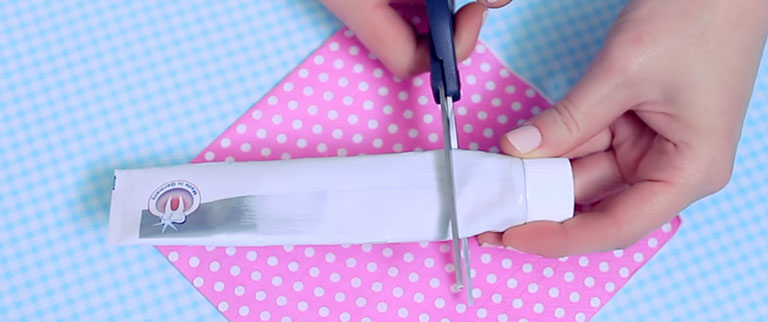
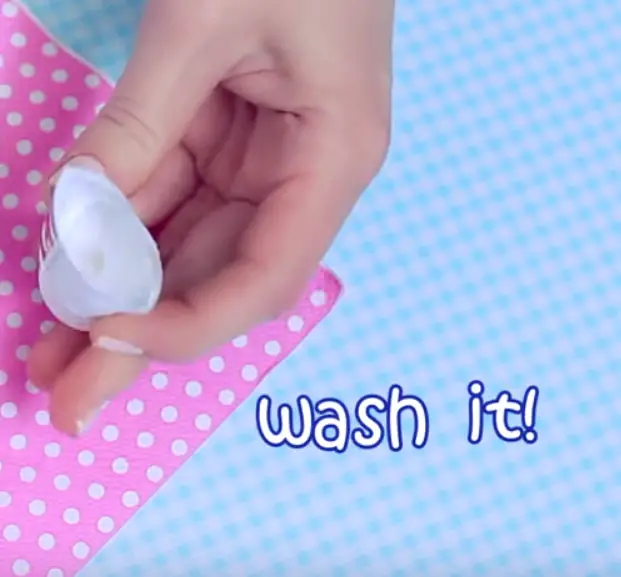
Step-3: Cutting & Cleaning the toothpaste can
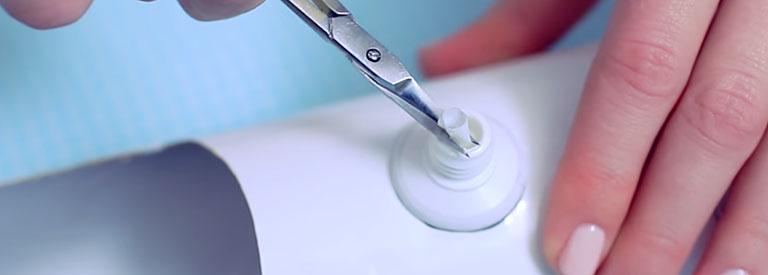
You need to cut the toothpaste can 1-1.5 meter below the cap and clean it properly with water. Throw away the other part.
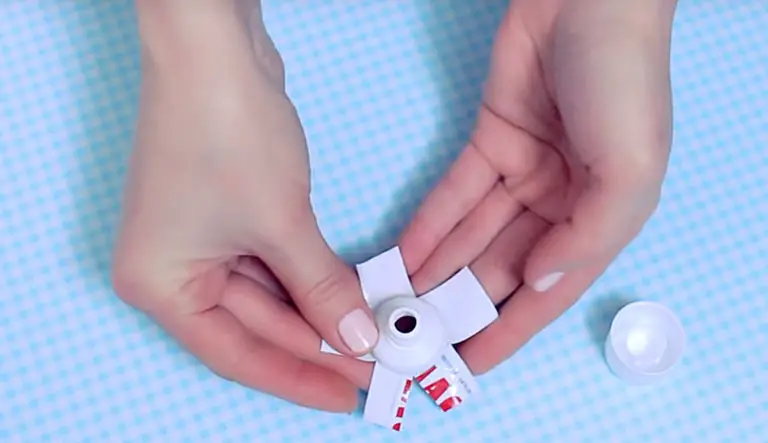
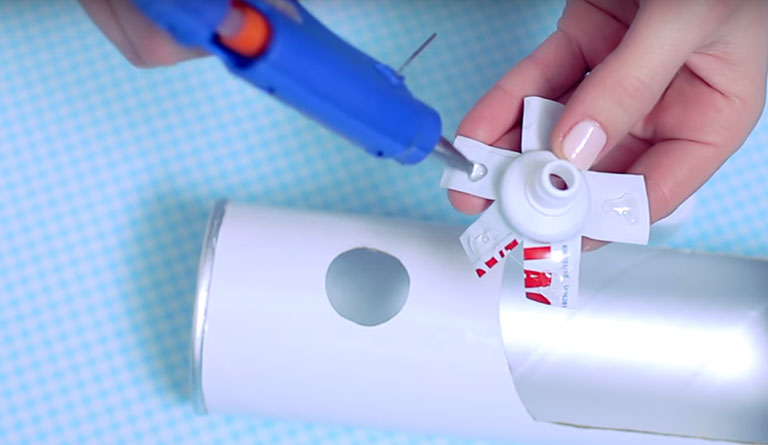
Step-4: Attaching the strips to the Pringles can
At this step, make small strips around the tube using the nail cutting scissor but make sure that the hard plastic part at the top remains intact. Now, extend the individual strips outwards and use hot glue gun drop on top of every strip. Now attach the toothpaste tube and fit it in the hole made in step 1 in a way that the front part of the tube comes out of the hole. This is to be done for the cap to attach on it. Follow the pictures given below:
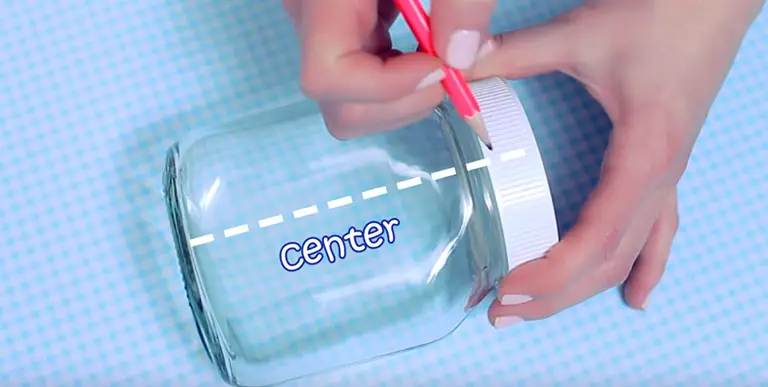
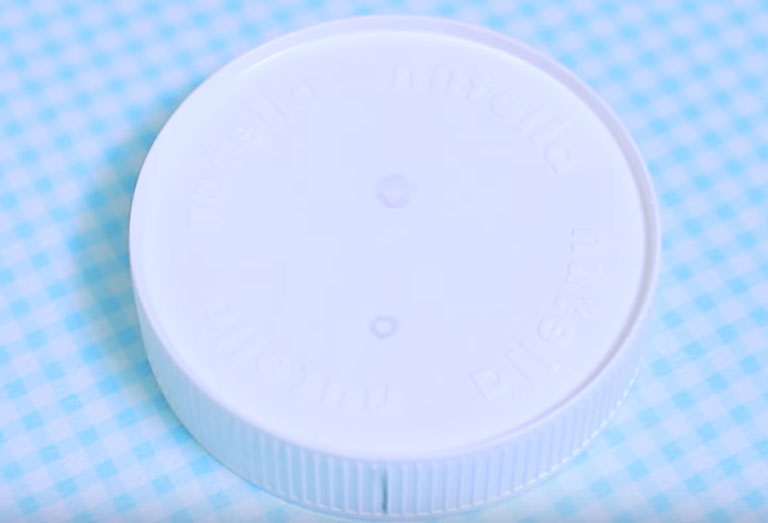
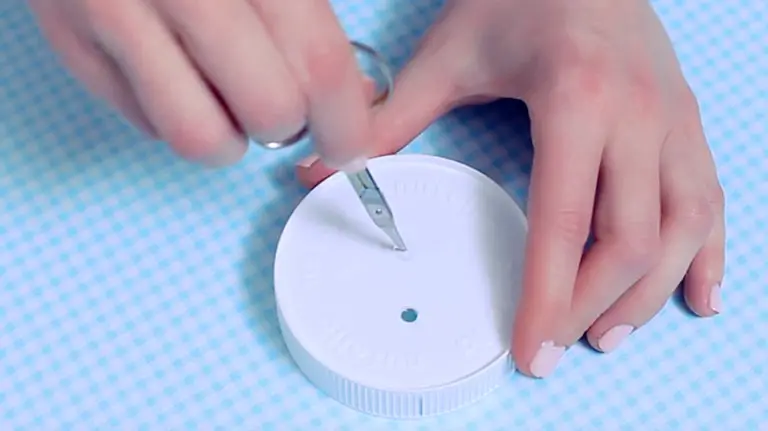
Step-5: Preparing the Nutella Jar Lid
Draw a line through the center of the Nutella jar lid and also mark on two sides. You will be needed to make two dots on top of the lid in line with the two marked points. Make sure that the distance between the two dots is at least 3 cm. Now, cut the two dots and insert a straw through any of the holes. Moreover, the diameter of the hole needs to be equal to 5 mm.
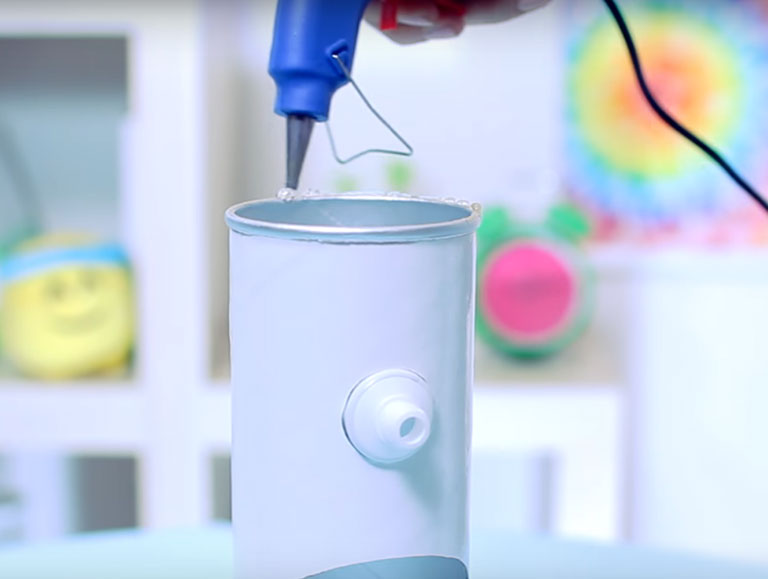
Step-6: Setting the Lid on top of the Pringles can
Use the glue gun to seal the hole through which the straw came out. Use the glue gun on top of the Pringles can stick the Nutella lid on it. Now. attach the lid on top of the can in a way that the other end of the straw comes out of the open head of toothpaste can. Now seal this hole with the help of glue gun and cut the extra part of the straw if that pops out from the toothpaste can. It will fit the toothpaste cap properly like before.
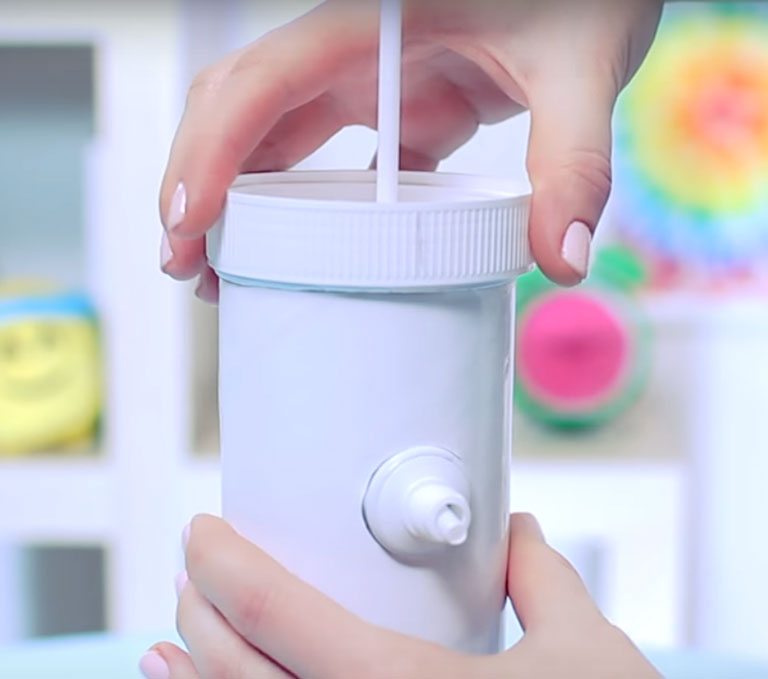
Step-7: Fill the Nutella Jar with Desired Drinks
This time you need to fill the jar with your desired drinks. Suppose, you fill it with water. Then you need to make the Pringles can upside down so that you can easily screw the jar with its lid without pouring the water here and there. Once the assembly is perfect with the Nutella jar and lid then put back the Pringles can to its normal.
Step-8: Dispensing the Drinks/Water
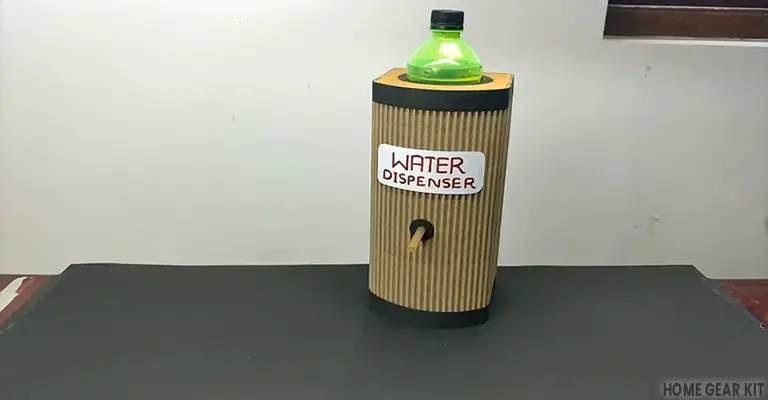
Now place a glass or mug inside the curved section of the dispenser and by gently turning the toothpaste cap you will be able to fill up the glass or mug. This is it, your homemade water dispenser with the help of used materials.
Conclusion
Whether you take hot or cold fluid, keeping a dispenser by your side is always a relief. In case the water’s heated, be it heated using a tankless or tank water heater, it’s every time the friend aside. Performing the above actions, you can be able to make a water dispenser at home easily. Feel encouraged, safe, and remain healthy always.