While installing a shower valve, it’s easy to make small mistakes and miss the mark. As a plumber, you wouldn’t fancy that. A Moen shower valve with its flow flexibility and compatibility makes it the most desired shower valve for the plumbers.
These valves have both threaded and soldered connections. Moreover, they are extremely adaptable to any kind of plumbing. So it’s natural that a plumber should know how to install a Moen shower valve easily and convincingly.
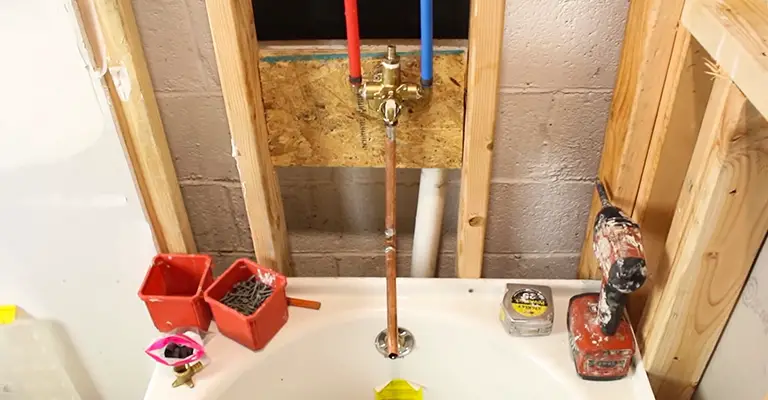
Table of Contents
How to install a Moen Shower Valve?
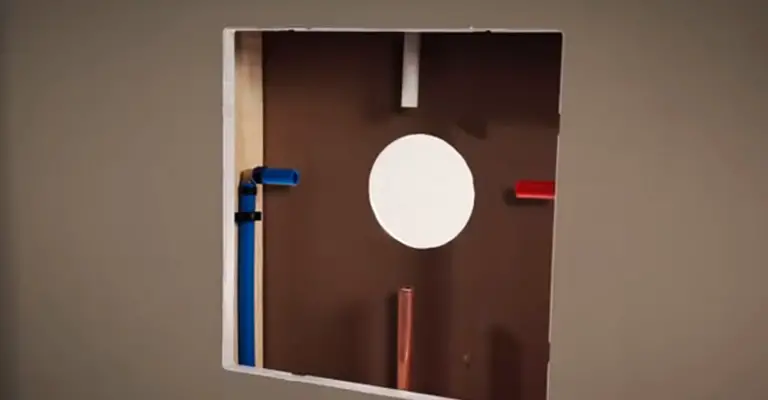
In a PEX to PEX installation, you’ll be connecting the shower valve to three existing PEX tube. You’ll also connect it to the existing copper tube which is the tub drop outlet. The processes are not much tough, but it takes some systematic approaches to get the job done.
Step 1: Preparation
The whole installation process takes about 3 to 4 hours. Two people are recommended to get the job done smoothly. Gather the required tools such as screwdrivers, pliers, wrenches, seal tape, and tape measure.
Step 2: Turn off Water Supply
Shut off your home’s main water supply. If you don’t know where it is, then try contacting your local water supply company.
Step 3: Create a Panel on the Wall
Determine whether the wall is thin or thick. A thick wall is more than 1/4″ and a thin wall is less than 1/4″. Assuming the wall is thin, the next step is to locate the access panel on the wall. By panel, we refer to the service area for plumbing. It should be located on the wall right behind the valve.
If there isn’t an opening, then create one. The dimension of the panel should be 14×14 inches square on the wall with the valve at the center.
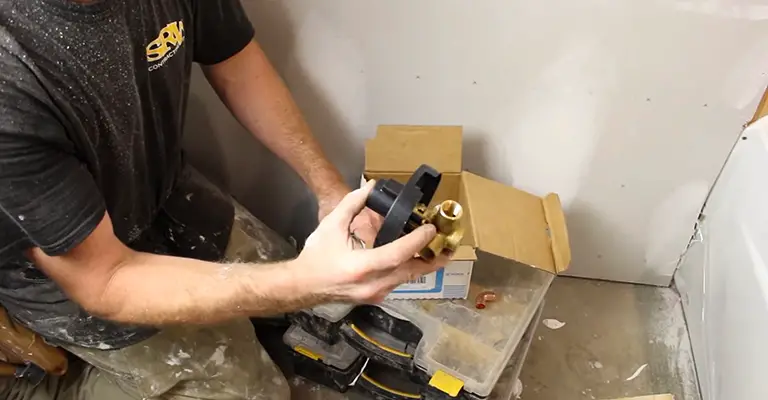
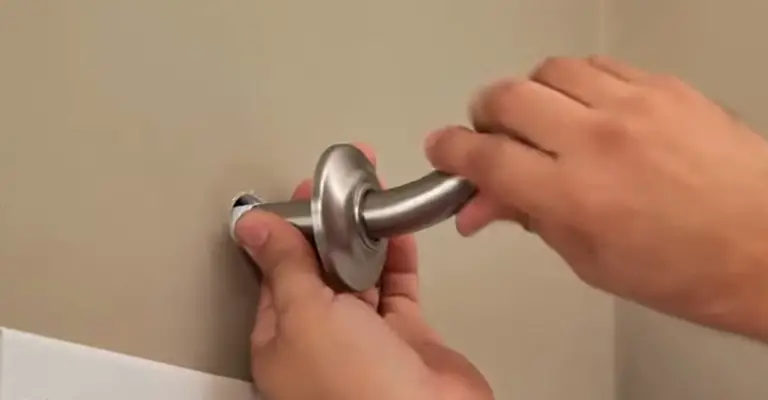
Step 4: Mount the Plaster Ground to the Valve
Attach the plaster ground to the valve using two escutcheon screws. The purpose of the plaster ground is to position the valve and secure it on your tub wall. The center of the valve should be positioned 32″ from the floor of the tub.
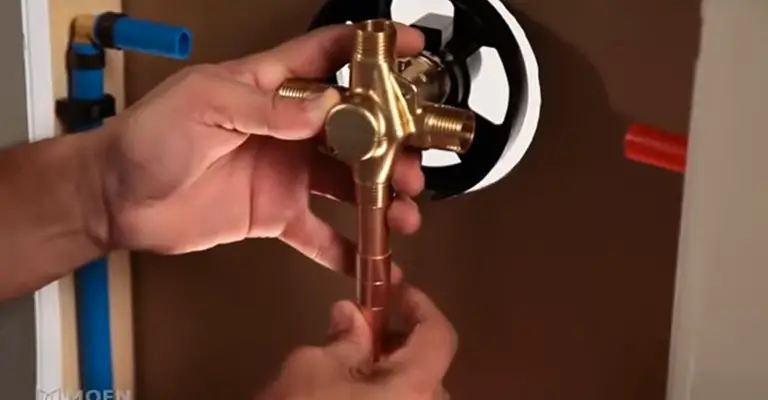
Step 4: Attach the Valve to Tub Drop Outlet
Now starts the mounting processes. Attach the new valve to the tub drop outlet. The tub drop outlet should be a half an inch copper tubing.
To continue with the process, place the valve in an appropriate position. Measure the distance between the top of the tub drop outlet and valve’s lower tubing.
Cut the copper tubing according to the measurement and attach the tub drop outlet with the copper tube portion via a copper coupling. Attach the whole segment to the existing tub drop outlet of the valve.
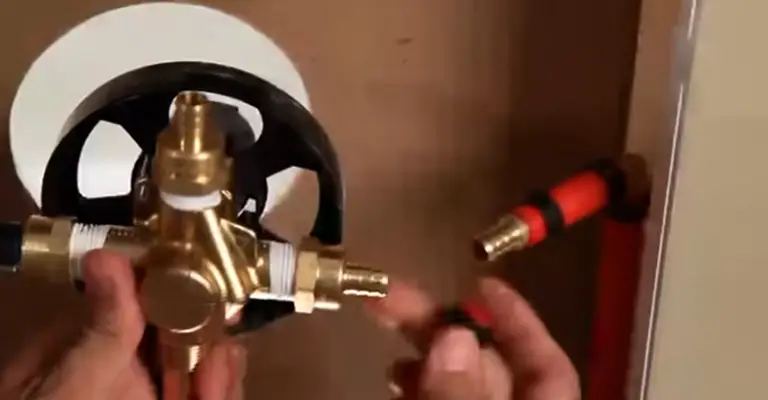
Step 5: Attach the Hot and Cold Water Inlet with the Valve
The next step starts with wrapping the seal thread tape around the inlets and outlet of the valve. Then screw a 1/2″ inch female bolt to the half an inch PEX adapter onto the male threads of each one. Using an adjustable wrench, tighten the bolts.
For each tube of hot and cold water, do proper measurements and use crimp rings and couplings to attach the tubes to the valve adapter. Use a crimping tool to tighten the crimp rings and secure the connections. Follow the same procedures for the other inlet and shower rising outlet.
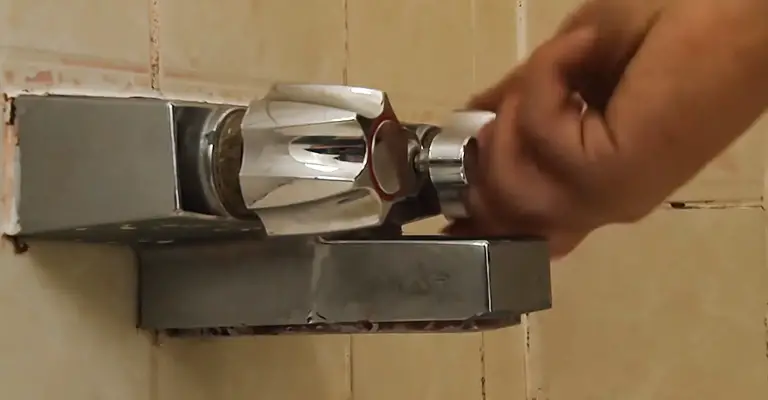
Step 6: Look for Leaks
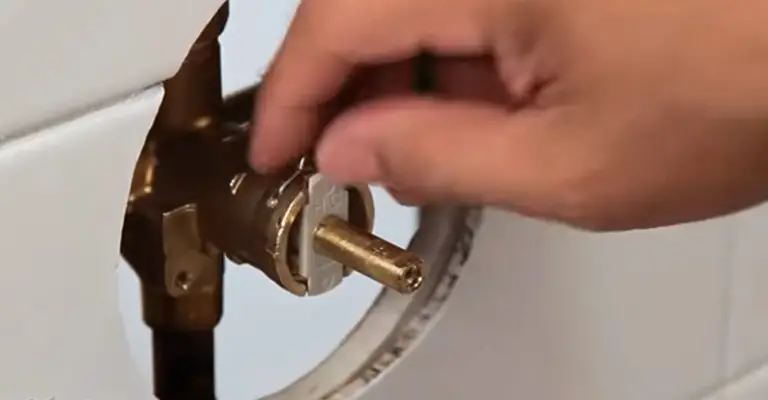
To get on with this, remove the cartridge from the valve. The removal takes a bit of caution as not to lose the screws. Take off the plaster ground and secure the screws. Then pull out the cartridge retainer clip and use pliers to remove the cartridge.
After that, turn on the home’s water supply and flush the system for 15 seconds with water to remove any debris and look for leaks. Reinsert the cartridge and retainer clip and install the plaster ground again.
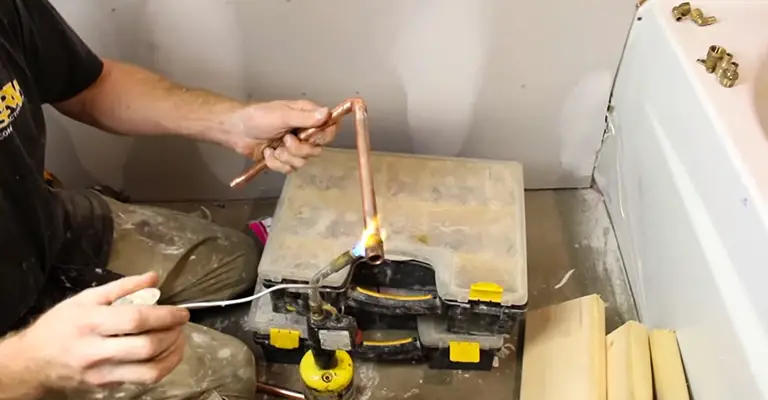
Step 7: Solder the Copper Fitting
Before we get to soldering, clean the tubes and valve with emery cloth and flux. Solder the copper tub drop outlet connection with extreme caution and your installation of Moen shower valve is finished.
Moen shower valves – different models and installation tips
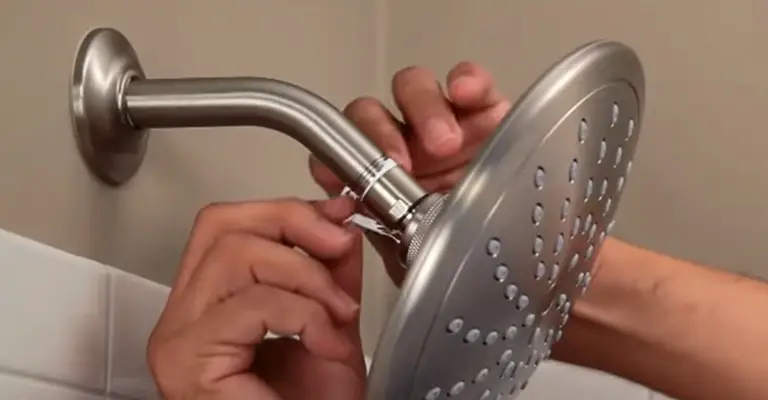
Shower valve functionality
Moen shower valves are designed to optimize the water flow by regulating temperature to create a custom shower experience in any configuration. Typically, as we have seen in the steps above, the valve sits behind the wall and connects to the hot and cold water supply lines, which allows you to separate the 2 temperatures. Moen valves use cartridges that in turn connect to the shower trim handle of your choice. So, the valve has a more behind-the-scenes purpose, and the trim handles are the visible part that you see on the wall and use to operate the shower. The main benefits of using Moen valves are that they conform to safety codes, offer durability to a homeowner, have a Limited Lifetime Warranty, and prevent sudden changes in temperatures. Of course, all of this also depends on how well you have installed a Moen shower valve. The following paragraphs zoom in on the different types of Moen shower valves and features – with some installation tips and resources to help you get the best out of your chosen shower accessories.
Moen shower valve features
The brand offers various shower valve features for different purposes. Pressure-Balancing systems ensure a steady pressure within the shower even when other faucets or fixtures are working – this prevents what is known as a shower shock. Thermostatic features focus on temperature regulation for better consistency and safety while using a shower. To add a Volume Control feature, you will need a separate transfer valve installed with the shower valve – this is when the same unit does not offer both temperature and volume control. In general, these features help you adjust the ideal water flow rate without slowing the shower flow when other fixtures are also working at the same time. A Cycling valve technology allows the valve to turn on and off based on cyclic repetitions. If you are using a smart shower valve, you will also enjoy features like Temperature Memory to save presets of your favorite shower settings.
Installation resources
You can visit the website Moen Shower Valves to refer to installation guides for your specific valve model. It has links to video tutorials, troubleshooting guides, valve installation steps, etc. to help DIYers and professionals in their projects. You will find videos on cartridge replacement, smart shower installations, and other valve setups. The website also provides compatible replacement parts for your specific Moen shower valve, so if you face technical issues down the road, just check the right part you need and place an order. You can download installation sheets as well. These include detailed diagrammatic illustrations, mounting steps, and measurements needed for accurate installation in a thick wall, thin wall, shower/tub area, and other spaces.
Installation tips
Here are some general installation tips for Moen shower valves. To get the exact measurements or technical numbers, you do need to refer to the brand’s installation guides from any of the resources mentioned above. However, the general rules apply to all valve types and include some safety measures to prevent accidents – which is why you should always thoroughly read the given documents for your specific Moen valve before buying and installing it.
- Remember to turn off the water supply before you start anything and keep the lines turned off until the instructions tell you to resume the supply. Both the hot and cold water lines should be turned off to ensure safety as you install the Moen valve and conduct tests for leaks.
- Any pipe debris can cause the cartridge seal to wear out quickly, and this can cause leaks and further damage. So, make sure your plumbing hardware is good to go before mounting the cartridge for a more durable setup.
- For a shower-only installation, the valve center needs to be around 45 to 48 inches above the floor – with the shower arm at a floor height of 78 inches.
- For a shower-and-tub installation, the valve will go around 32 inches from the tub floor – with the tub spout between 6 to 11 inches below the valve.
- If you are installing a Moen shower valve on a thick wall (drywall or tile), remember that the valve needs to be mounted to a brace. Thick wall installations work with a shower wall thickness of more than ¼ inches. You can use the plaster ground to guide the alignment process for better accuracy. You will typically need to drill a hole in the wall to match your plaster ground, and this hole is where the valve will be installed and accessed for any servicing later on. Once the plaster ground is mounted flush with the thick wall, the valve will be at the perfect distance to connect to the shower trim. You can then add the water lines.
- For thin-wall installations, the shower wall should be less than ¼ inches thick. You will need the plaster ground to support the installation, so it does need to remain connected with the valve. Drill a compatible hole that can accommodate the assembly. In this case, the hole will only let you access the valve and not the plaster ground. Once the units are assembled, you can connect the water lines to the shower valve.
- If your valve rough-in has been installed too deep in the wall, you can always use Moen’s extension kit to fix this problem. Make sure to refer to the website for compatible extension kit options that will match your valve type as well as the shower trim.
Moen shower valve models
The following are the main categories of Moen shower valves:
- U by Moen™ shower valve: a digital thermostatic shower valve that you can operate using a digital controller, Moen’s app, and voice commands.
- ExactTemp shower valve: a mechanical thermostatic valve available in different configurations.
- M-CORE transfer valve: you can use a transfer valve to create multiple showering systems based on the number of outlets.
- Posi-Temp shower valve: a pressure-balancing cycling valve that cuts down pressure/temperature surges.
- Two and Three-Function transfer valve: it is useful for spray outlet installations.
- M-PACT common valve: it helps to keep the valve and trim technically separate so that you can replace the trim without changing the valve – this comes in handy for future renovations.
These were the main valve categories listed in brief, and the following are some examples of popular Moen shower valves with relevant installation advice for each type. A quick reminder: for specific measurements and technical information, please check the installation resources for whichever valve model you are using.
Moen Posi-Temp shower valve
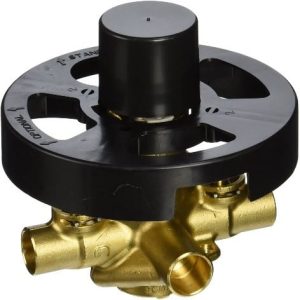
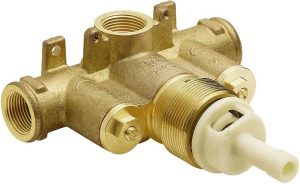
Moen 2570 Rough-In Posi-Temp shower valve features the M-PACT common valve system. This valve is easy to install using the Posi-Temp pressure-balancing feature. It comes with the 1222 cartridge type and is compatible with both shower and tub installations using copper, CPVC, crimp ring PEX, cold expansion PEX, and IPS. The supported connection size is ½ inch CC. Quarter-turn stops are included so that you do not have to turn off the main line water – although you do need to turn off the water supply before you replace the cartridge. This Moen shower valve also supports back-to-back installations and can work with shower-only, shower-and-tub, thick-wall, and thin-wall settings.
Moen M-CORE 4-port shower valve
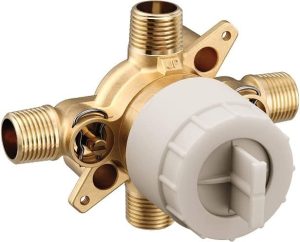
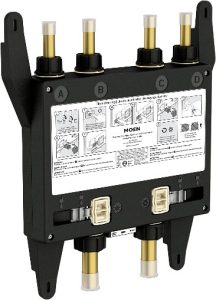
Moen U140CIS M-CORE 3-series 4-port tub-and-shower valve relies on the innovative M-CORE technology which is designed for making installations easier and quicker – thanks to the integrated mounting bracket that connects the valve and brace. The cartridge is included with this valve.
You can use the valve for both thick and thin wall installations as well as shower-only settings. The connection size is ½ inch with CC/IPS connection types. You need to install the flush plug and any stop clips before doing pressure testing and using the valve. This shower valve also offers volume control.
Moen ExactTemp shower valve
Moen S3371 ExactTemp rough-in shower valve offers precise temperature control with improved volume control. You can use this valve for setting up multiple shower units including single showerheads and vertical spa. It requires a 3/4-inch IPS connection and is compatible with common household plumbing – however, you will need Moen M-PACT trim kits to go with this hardware. The valve uses a thermostatic cartridge and can be installed in shower-only, shower-and-tub, finished-wall, and thin-wall configurations.
U by Moen 4-outlet smart shower valve
Moen S3104 smart 4-outlet digital thermostatic shower valve is the perfect choice for smart homes and has 4 outlets that will help you connect up to 4 shower units (whether independent or shared).
It works with one TS3304TB digital controller, voice commands, and the Moen Smart Water Network app. The compact size allows for flexible installation near a GFCI outlet – the 30-feet waterproof data cable also helps you install the valve at convenient distances from the controller based on your available space. The data cable does need careful handling so that it does not get damaged on its way around the infrastructure. Otherwise, sharp corners or rough holes can cut through the cable and cause potential hazards.
You need to make sure that there is an access panel of at least 14″ W x 29″ H nearby before installing this Wi-Fi-enabled valve. It requires connection sizes of 3/4″ inlets and 1/2″ outlets for the CC type. Take care not to install this smart shower valve in areas where the temperature exceeds 104°F or drops down to freezing levels. Due to the technical nature of such a smart shower valve system, it is highly recommended to call a certified, professional electrician to handle everything. This is to make sure that the setup is reliable and all the safety checks are met. You should also avoid tampering with the valve design for DIY hacks because this can damage the smart features – apart from nullifying the valve’s warranty.
Lastly, you might want to consider asking the electrician to also install an optional smart valve battery backup kit 179573. This battery kit is designed as a backup source in case of a power outage. It comes in handy when the power is out because the smart valve can only be operated via the app, voice, or digital controller. There are no trim handles in such a system, so using a battery kit will prevent you from being locked out of your shower.
Epilogue
Although the whole installation process may seem lengthy, it is fairly easy for professional plumbers to get it done. But if you’re a novice, or planning to do the job yourself, you must abide by safety regulations. Being prepared with the right tools and knowing the working ground should give you a good grasp of how well you can pull it off.
You may like to read how high should your shower be.